 blog
5 Common Causes: Refrigerator Ice Maker Not Working
Table of Contents
- Why Your Refrigerator Ice Maker Stopped Working: A Quick Diagnostic
- Cause 1: The Ice Maker Switch Is Off or the Power Supply Is Interrupted
- Cause 2: Freezer Temperature for Ice Maker Is Too Warm
- Cause 3: Ice Maker Not Getting Water Due to a Blocked or Frozen Water Line
- Cause 4: A Clogged Water Filter Is Restricting Flow
- Cause 5: A Faulty Door Seal or Water Inlet Valve
- Refrigerator Ice Maker Troubleshooting: Step-by-Step Checks for Each Cause
- Ice Production Timelines: How Long Fixes Take to Show Results
- Refrigerator Ice Maker Repair Cost vs. Replacement: What to Expect
- When to Call a Professional for Ice Maker Repair
- Frequently Asked Questions
Last Updated: October 16, 2026
Why Your Refrigerator Ice Maker Stopped Working: A Quick Diagnostic
A refrigerator ice maker that stops working is rarely a sign that the whole appliance is failing. In most homes, the problem traces back to one of five simple causes: the ice maker is switched off, the freezer is too warm, the water line is blocked or frozen, the water filter is clogged, or a door seal and water inlet valve has failed. This guide from The Appliance Wizard walks through each cause in order, from the easiest check to the hardest.
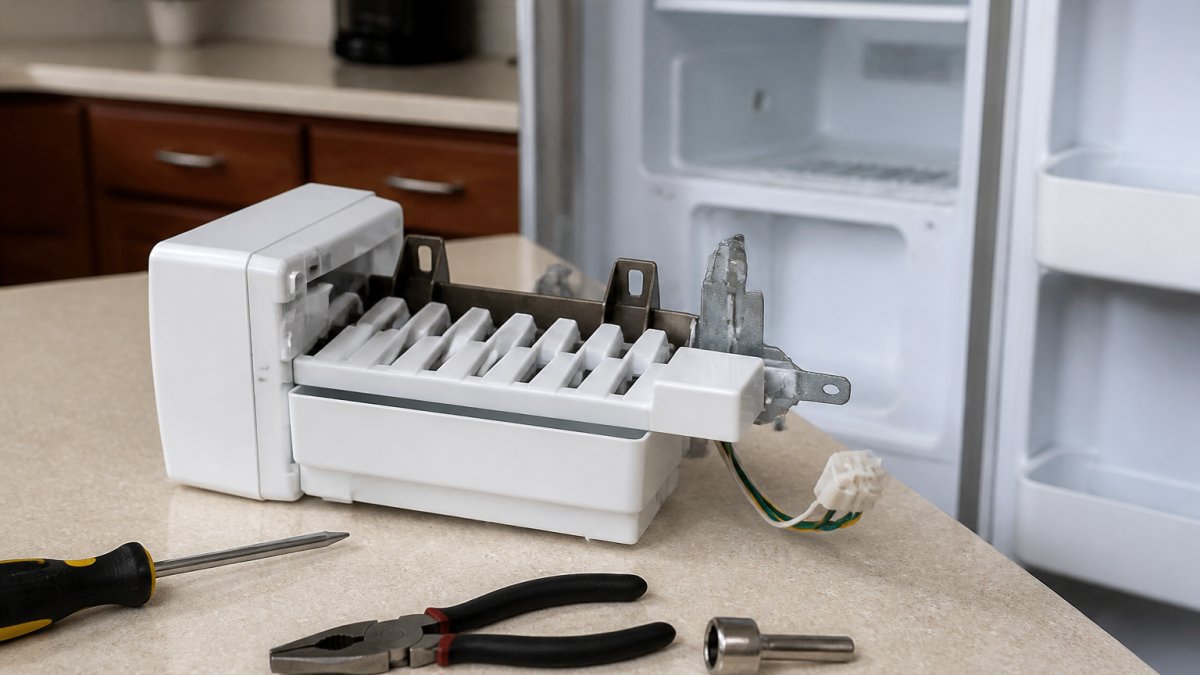
The ice maker is the part of your freezer that fills a mold with water, freezes it into cubes, and drops them into the ice bin. That cycle depends on four things working together: power, cold air, water flow, and a sealed door. Break any one of them, and you get no ice or low ice production.
That is why we wrote this as a ranked list instead of a random checklist. You start with the checks that cost nothing and take two minutes. You finish with the ones that need a wrench or a technician. Most people find their answer in the first two.
Cause 1: The Ice Maker Switch Is Off or the Power Supply Is Interrupted
The most common cause is also the most overlooked: the ice maker switch is off or has lost power. Start here before you touch anything else.
Look for the shut-off arm or switch inside the freezer. Many models have a wire arm that flips down to turn ice production on and up to turn it off. Others use a small switch or a button on the control panel. If that arm is up or the switch reads "Off," the unit will sit silent and produce nothing.
Next, check the power supply. A tripped GFCI outlet or a loose plug behind the fridge will cut power to the whole unit, not just the ice maker. Press the reset button on the outlet and confirm the cord is fully seated.
- Shut-off arm: flip it down to the "On" position
- Control panel switch: set it to "Ice On"
- Outlet: test with a lamp or phone charger
- Breaker: reset the kitchen circuit if it tripped
If your fridge has a display, watch for an error code. Many models flash a code when the ice maker loses power or communication.
Cause 2: Freezer Temperature for Ice Maker Is Too Warm
Freezer temperature for ice maker function needs to sit at 0°F or below. If the freezer runs warmer than that, water in the mold never fully freezes, and the unit either makes small ice cubes or none at all.
Check the temperature with a standalone thermometer, not the fridge's own display. Built-in readouts can drift. Place a thermometer between frozen items and leave it overnight for an accurate reading.
If the freezer is too warm, look at these common culprits:
- The freezer door was left ajar or is not sealing
- The condenser coils behind or beneath the fridge are dusty
- The evaporator fan is not moving cold air
- The temperature setting was bumped during a recent cleaning
Clean the coils and confirm the fan runs when the door closes. Push the temperature setting down a notch and give it a full day to recover.
Cause 3: Ice Maker Not Getting Water Due to a Blocked or Frozen Water Line
An ice maker not getting water is usually a blocked or frozen water line. This is the third most common cause and the one that trips up the most DIYers, because the failure looks identical whether the line is kinked, frozen, valved off, or full of air.
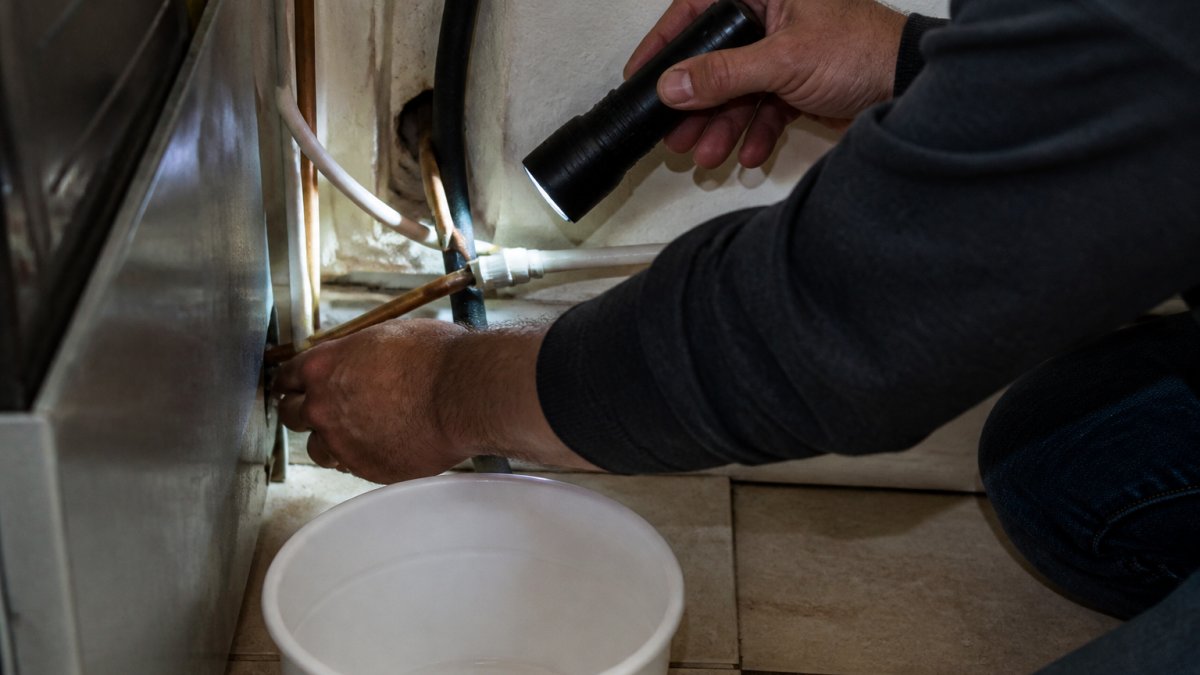
Start at the shut-off valve, not the fridge
Trace the thin water line from the back of the fridge to the supply. Most homes feed the fridge from one of two valve types:
- Saddle valve (piercing valve): clamps onto a copper pipe and pierces it with a needle. The handle must be turned fully counterclockwise to open. These clog with mineral scale over time and are a frequent culprit on older installs.
- Inline shut-off valve: a dedicated valve on a tee. Confirm the handle is parallel to the pipe (open), not perpendicular (closed).
A common pattern is a saddle valve that was only opened halfway during installation. Flow is enough to fill a glass slowly but not enough to refill the ice mold on schedule.
Rule out a kink before you thaw anything
A kink of even a quarter inch can stop flow completely. Pull the fridge out far enough to see the full run of tubing and look for:
- A pinch where the fridge was pushed back against the wall
- A sharp bend at the compression fitting
- Tubing crushed under the fridge's own weight
Straighten the kink and check for flow at the dispenser before moving on. If the line is clear, the problem is likely ice.
Where the line actually freezes
The water line freezes in one of two places, and knowing which one saves you a wasted afternoon:
- Inside the freezer compartment, the last few inches of tubing pass behind the freezer wall to the inlet. If the freezer runs colder than 0°F or the line sits too close to the evaporator, this segment ices solid.
- In the door or hinge area, on models that route water through the door, the line can freeze at the hinge where cold air leaks in.
Unplug the fridge and let it thaw for a few hours with the doors open. Do not use a hair dryer or heat gun on plastic tubing, the wall thickness is thin and it deforms fast. A towel and time are the safe tools here.
Prime the system after any interruption
New installations and any repair that drained the line trap air in the water system. Priming the water system after installation clears that air and restores normal flow:
- Run the water dispenser for about two minutes, or until flow is steady with no sputtering.
- Discard the first few glasses, they will be cloudy from trapped air.
- Then let the ice maker run its normal cycle.
If you skip priming, the ice maker's first fill can be short, and you will misdiagnose a working unit as broken.
- Kinked line: straighten it and check for flow
- Closed saddle valve: turn the handle counterclockwise to open fully
- Frozen line: unplug the unit and let it thaw, no heat guns
- Air in plumbing lines: run the dispenser for two minutes to purge
Model-specific note
Not every fridge routes water the same way. Side-by-side and French-door models often run the line through a hinge, while top-freezer models usually feed straight through the back wall. If your manual shows a different routing, follow the manual, applying the wrong thaw location can leave the actual frozen segment untouched.
Cause 4: A Clogged Water Filter Is Restricting Flow
A clogged water filter restricts flow and starves the ice maker of water. If your fridge has a filter, this is the fourth cause to rule out.
Filters trap sediment, chlorine, and minerals. Over time, they load up and slow the water to a trickle. A slow trickle means small ice cubes, hollow cubes, or an ice cycle that never completes.
Replace the filter every six months, or sooner if your water is hard or you notice a drop in dispenser pressure. After replacement, flush two to three gallons through the dispenser to clear air and loose carbon.
- Signs of a clogged filter: slow dispenser, cloudy cubes, odd taste
- Replacement interval: every six months
- After replacement: flush until the water runs clear
- Bypass option: some units run without a filter, but check your manual first
If you skip the flush, carbon dust can clog the inlet screen and cause the same problem you were trying to fix.
Cause 5: A Faulty Door Seal or Water Inlet Valve
A faulty door seal or water inlet valve is the fifth cause, and it is the one that usually needs a part. The door seal keeps cold air in. The inlet valve lets water in on command. Fail either one, and ice production stops.
Test the door seal with the dollar bill trick. Close the freezer door on a bill and pull it out. If it slides out with no resistance, the gasket is worn and needs replacing.
The water inlet valve sits behind the fridge where the water line connects. If the valve is clogged with mineral buildup or the solenoid has failed, no water reaches the mold. You can often hear a faint click when the valve opens. No click means no signal or a dead valve.
Refrigerator Ice Maker Troubleshooting: Step-by-Step Checks for Each Cause
Refrigerator ice maker troubleshooting works best when you follow a fixed order. Here is the sequence we use in the field, from fastest check to slowest.
Total time: 30-45 minutes for all five checks Difficulty: Beginner to intermediate
What you'll need:
- A standalone freezer thermometer
- A flashlight
- A towel or small bucket
- A replacement filter, if yours is due
Here is the full diagnostic order:
- Confirm the switch is on. Flip the shut-off arm down and check the control panel. [2 minutes]
- Test the outlet. Plug in a lamp to confirm power. [2 minutes]
- Read the freezer temp. Use a standalone thermometer overnight. [12 hours, passive]
- Inspect the water line. Look for kinks, ice, or a closed valve. [5 minutes]
- Check the filter. Replace if it is older than six months. [10 minutes]
- Test the door seal. Run the dollar bill test on all four sides. [3 minutes]
- Listen to the inlet valve. A faint click means it is trying to open. [1 minute]
| Symptom | Most Likely Cause | First Check |
|---|---|---|
| No ice at all | Switch off or no power | Shut-off arm and outlet |
| Small or hollow cubes | Warm freezer or low water flow | Freezer temp and filter |
| Intermittent ice production | Frozen water line | Thaw the line |
| Ice tastes odd | Old filter | Replace the filter |
| Loud hum, no ice | Failed inlet valve | Listen for the click |
If you work the list in order, you will usually land on the answer by step four. That saves you from buying parts you do not need.
Ice Production Timelines: How Long Fixes Take to Show Results
Ice production timelines depend on the cause and the fix. Do not expect a full bin the moment you flip a switch. Here is what to expect after each fix.
After you turn the ice maker back on, the first cycle takes about 90 minutes to two hours. A full bin takes 24 hours on most models. If you replaced a filter or thawed a frozen line, add a few hours for the system to refill and purge air.
- Switch or power fix: first cubes in 1-2 hours
- Temperature fix: 12-24 hours to recover
- Frozen line thaw: 4-6 hours after restart
- Filter replacement: 2-4 hours after flush
- Valve replacement: first cubes within 24 hours
Give any fix a full 24 hours before you judge it. Empty ice cycles right after a repair are normal while the mold refills.
Refrigerator Ice Maker Repair Cost vs. Replacement: What to Expect
Refrigerator ice maker repair cost depends on the part and whether you do the work yourself. Here is the pattern most service techs see.
Typical parts and labor ranges
A service call itself typically runs $75-$150 just to diagnose, and many shops credit that toward the repair if you approve the work.
The repair-versus-replace math
A widely used rule of thumb in appliance repair: if the repair costs more than half the price of a comparable new refrigerator, replace it. A second rule: if the fridge is 10 years or older and this is its second major failure, replacement usually wins.
Run the numbers on your own unit:
What you can realistically DIY
Filters, gaskets, inlet valves, and thawing a frozen line are all reasonable DIY jobs with basic tools. Ice maker modules are doable on many models but require pulling the unit and reconnecting a wire harness, check your model's service manual first. Control boards and anything touching the sealed system should go to a technician.
When a technician is the cheaper option
If you have already bought one wrong part or spent two weekends guessing, the diagnostic fee is often cheaper than the next guess. A tech with a multimeter can confirm a failed valve or board in minutes rather than the hours it takes to swap parts by trial and error.
You can check current ENERGY STAR guidance on refrigerator lifespan and efficiency to weigh a repair against a new, more efficient model, a newer unit can offset part of its price through lower energy use over its life.
When to Call a Professional for Ice Maker Repair
Call a professional when the fix involves the sealed system, the control board, or wiring you cannot safely reach. These are jobs that need tools and training most homeowners do not have.
Stop and call a technician if you see any of these:
- Frost or ice buildup on the back wall of the freezer
- A compressor that runs nonstop or clicks without starting
- Burn marks or a burnt smell near the control board
- Water leaking from a valve you cannot shut off
- A repair that needs the fridge pulled out and partially disassembled
For everything else, the five causes in this guide cover the vast majority of failures. Work the list in order, give each fix a full day, and you will solve most problems without a service call.
At The Appliance Wizard, our factory-trained, certified technicians handle in-home ice maker repair, maintenance, and warranty support across most major makes and models. We also stock genuine replacement parts for DIYers who want to do the job themselves. If you are weighing a repair against a new fridge, our team can help you compare both paths with no pressure and no hidden loopholes.
A dead ice maker is frustrating, but it is rarely a mystery once you know where to look. Most failures come down to power, temperature, or water flow, and you can check all three in under an hour. When the fix needs a part or a trained hand, The Appliance Wizard is here to help. We offer in-home repair from certified technicians, genuine replacement parts for DIYers, and price match plus flexible financing if you decide it is time for a new refrigerator instead. Get started with The Appliance Wizard and get your ice maker running again.
Frequently Asked Questions
Why would a refrigerator not make ice?
The most common reasons are a switched-off ice maker, a freezer that is too warm, a blocked or frozen water line, a clogged water filter, or a faulty door seal. Start by checking that the ice maker switch is on and the freezer is at 0°F or below. If those are fine, inspect the water supply line for kinks or ice blockages and confirm the filter is less than six months old. Most no-ice issues trace back to one of these five causes.
What is the average cost to fix an ice maker in a refrigerator?
Repair costs vary widely depending on the part and whether you hire a technician. For an exact quote on your model, contact a service provider with your refrigerator's make and model number.
How do I troubleshoot a refrigerator ice maker that is not making ice?
Begin by confirming the ice maker switch is on and the freezer temperature is at 0°F. Next, check the water supply line behind the fridge for kinks or frost. Test the water dispenser: if water flows but no ice is made, the issue is likely the ice maker itself. If no water flows, the filter or inlet valve may be clogged. After any fix, discard the first two to three batches of ice to clear air and debris.
When should I call an appliance repair technician for an ice maker problem?
Call a technician if you have checked the switch, temperature, water line, and filter but still have no ice after 24 hours. Also call if you see water leaking around the ice maker, hear unusual grinding noises, or if the refrigerator is under warranty. DIY repairs on sealed components can void coverage. A certified technician can diagnose the inlet valve, control board, or ice maker module accurately and complete the repair safely.