 blog
Best Kitchen Layout for Open Floor Plans
Table of Contents
- Why Kitchen Layout Matters in Open Floor Plans
- Open Kitchen Layout Ideas: The Core Designs
- Kitchen Island Layout: Placement and Clearance
- Small Open-Concept Kitchen Layout: Maximizing Tight Spaces
- Work Triangle and Workflow in Open Kitchens
- Zoning and Visual Separation Without Walls
- Open-Plan Kitchen Pros and Cons: What to Expect
- Appliance Placement and Kitchen Workflow
- Lighting and Flooring for Cohesive Open Spaces
- Frequently Asked Questions
Last Updated: October 14, 2026
Why Kitchen Layout Matters in Open Floor Plans
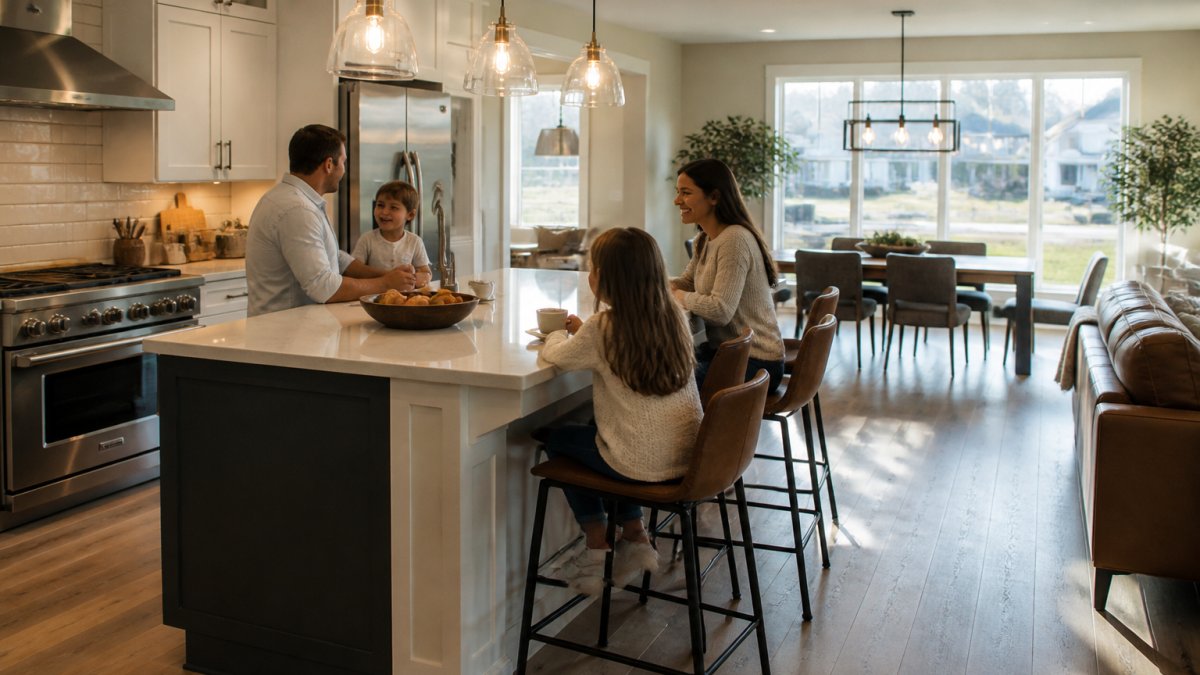
A best kitchen layout for open floor plans determines how your space functions, how you move through it, and whether cooking feels connected or chaotic. It affects traffic flow, appliance placement, storage access, and how well your kitchen connects to dining and living areas.
Open-plan kitchens blend cooking, eating, and living into one continuous space, which creates both connection and complexity. Without walls to separate zones, every choice ripples across the room: a poorly positioned island blocks sightlines, bad lighting makes cooking difficult, and appliances placed without workflow create bottlenecks.
Let's explore the layouts that work best for open-plan spaces and how to adapt them to your floor plan.
Open Kitchen Layout Ideas: The Core Designs
Most successful open-plan kitchens follow one of three proven layouts, each suited to different space shapes, appliance needs, and counter space requirements.
L-Shaped Layout
An L-shaped kitchen layout positions appliances and cabinets along two perpendicular walls, leaving the other two sides open to dining and living areas. This maximizes your cooking zone while keeping it visually separate.
The L-shape works well in open plans because it creates a natural boundary without a wall. Your work triangle flows smoothly: refrigerator on one leg, range on the other, sink connecting them. Guests can gather at a peninsula or island extending from the short leg without crowding your workspace.
Common mistakes include placing the sink in the corner (hard to reach, poor sightlines) and making the legs too short. Aim for at least 10 feet per leg if space allows, giving you adequate counter space without feeling cramped.
U-Shaped Layout
A U-shaped kitchen layout wraps cabinetry and appliances around three walls, creating maximum storage and counter space. In open plans, one leg typically faces the dining or living area, framing your kitchen zone.
The U-shape offers the most counter and storage of any layout, with a compact work triangle and traffic that stays out of your cooking zone. It shines when you need serious prep space or have a fairly large open-plan kitchen.
The downside: U-shapes can feel enclosed, and the back wall becomes a dead zone if not planned carefully. Put your most-used appliances on the two legs facing your living areas, and keep the back wall for less-frequent items or tall storage.
Galley Layout
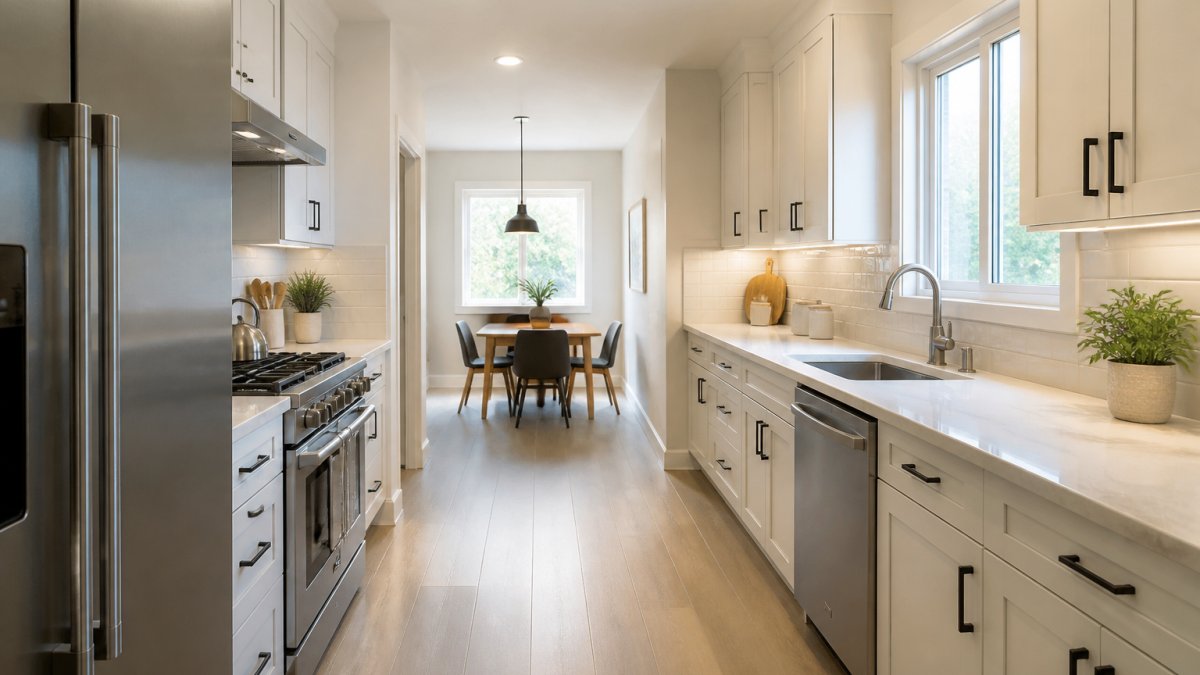
A galley kitchen layout runs appliances and cabinets along two parallel walls with a walkway between them. Traditionally found in smaller homes, galley kitchens work beautifully in open plans when oriented perpendicular to your dining area.
Galley layouts maximize efficiency in tight spaces: the work triangle compresses into a straight line and everything is within arm's reach. Facing your living areas, a galley creates a clear visual boundary while keeping the cook connected to guests.
The trade-off is counter space and a "corridor" feeling. Galley layouts work best when your open-plan kitchen is at least 8 feet wide and positioned so you're not cooking with your back to the room.
Kitchen Island Layout: Placement and Clearance
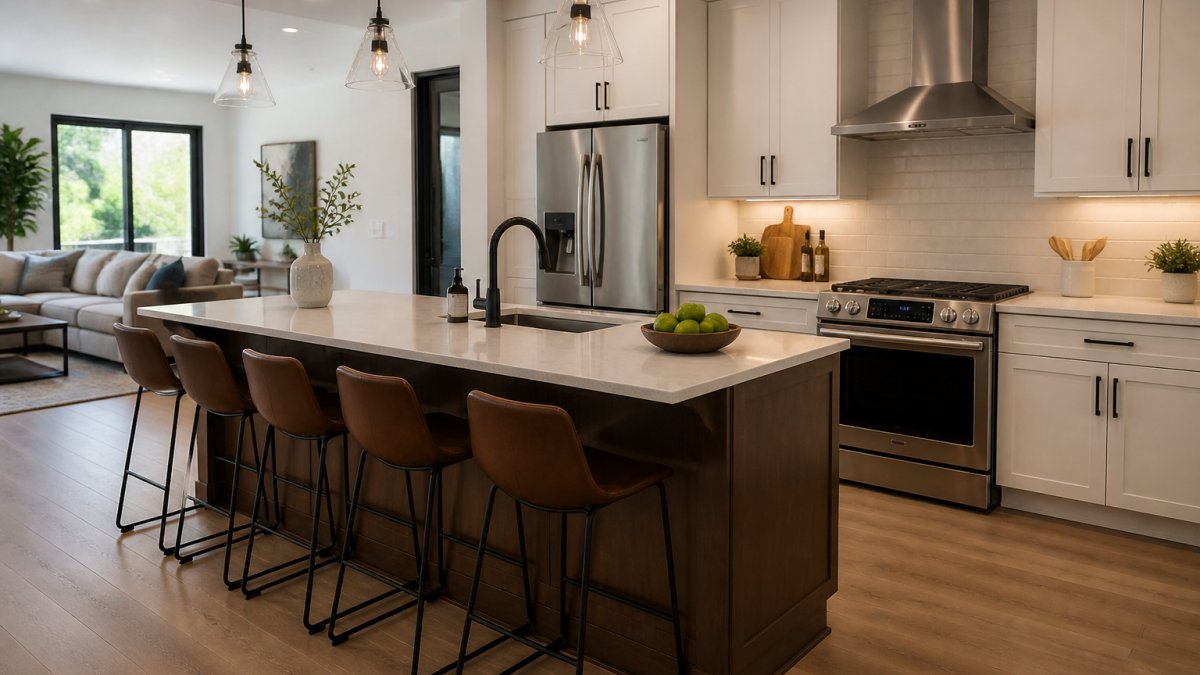
A kitchen island layout adds a freestanding counter and storage unit to your open-plan space. Islands anchor the kitchen zone, add workspace, and create natural gathering spots.
Islands define your cooking area without blocking sightlines. Unlike walls, an island lets people see across the space while creating a subtle boundary, and seating on the side facing your living areas turns it into an informal dining or socializing hub.
Clearance matters more than you might think. Leave at least 3 feet of walking space on all sides of your island, increasing to 4 feet minimum if you place a sink or cooktop there. A 4-foot-wide island is standard; 5 feet gives more flexibility for seating and appliances. Keep islands at least 9 feet from the wall behind them so refrigerator doors and drawers open without obstruction.
Position your island to anchor the kitchen without blocking traffic. Avoid placing it directly between the kitchen and living areas where it becomes a barrier; instead, set it parallel to your main work wall so flow moves naturally from cooking to dining and living spaces.
Small Open-Concept Kitchen Layout: Maximizing Tight Spaces
Small open-plan kitchens demand smart design: every inch counts, and layout choices matter more because there's no room for wasted space or poor workflow. The hard problem is a 90- to 130-square-foot footprint that still has to cook, eat, and host.
Start by measuring, not browsing. Note your room's length and width, doorway locations, and window positions, those three facts eliminate half the layouts before you draw anything.
Choosing a layout by room shape
- Narrow and long (roughly 8 to 10 feet wide): a single-wall kitchen along the longest wall, or a galley if you can spare two parallel runs. A galley needs at least 8 feet of width so the walkway between counters stays usable; below that, a single wall plus a movable island is the safer call.
- Roughly square (10 to 12 feet each way): an L-shape along two adjacent walls keeps the remaining two sides open to dining and living. This is the most forgiving small-space layout because it leaves a clear path through the room.
- Irregular or chopped by doorways: treat the kitchen as a single wall plus a peninsula that doubles as a dining ledge. Peninsulas cost less floor space than islands because they attach to a wall or cabinet run.
Aisle clearances that actually work
Aisle width is where small kitchens succeed or fail. A common planning pattern is a 42-inch aisle between a counter and an opposing counter or island for a single cook, widening toward 48 inches if two people pass or the aisle doubles as a traffic path. Below about 36 inches, drawers and appliance doors collide with whoever is walking through.
If you're weighing an island in a tight room, remember the clearance rule: you need walkable space on every side, and an island leaving less than about 36 inches on its working side feels like an obstacle rather than a workspace.
Islands and carts in tight rooms
If your small kitchen must have an island, make it narrow (about 2.5 to 3 feet deep) and use it for prep or seating only, not appliances, positioned at the end of your main work wall. Often better: a rolling cart or slim peninsula that can be pushed aside for a crowd and doesn't require permanent clearance.
Storage that doesn't eat floor space
Vertical storage is essential in small spaces. Install cabinets higher, use wall-mounted shelving, and consider a tall pantry cabinet if you have wall space. Two specifics that pay off:
- Take upper cabinets to the ceiling and use the top shelf for seasonal or occasional items, so the everyday zone stays reachable.
- Use the space above the refrigerator and inside corner cabinets with pull-out or lazy-Susan hardware rather than letting corners become dead zones.
Accessibility and multigenerational use
Small open kitchens often need to work for more than one kind of user. If anyone has limited reach or mobility, plan a clear path at least 36 inches wide, keep most-used items between counter and shoulder height, and leave knee space at one counter section for seated work. A counter-height microwave or refrigerator drawer beats an over-the-range unit. These choices cost little at planning and are expensive to retrofit.
Managing noise and odors in a small footprint
In a compact open plan, sound and smell travel fast. A range hood ducted to the exterior beats a recirculating model, and running it on high for a few minutes after cooking clears lingering odors. Soft surfaces, an area rug, upholstered seating, curtains, absorb the clatter of blenders, dishwashers, and hoods that would otherwise bounce off hard floors and cabinets.
Work Triangle and Workflow in Open Kitchens
The work triangle connects your refrigerator, range, and sink. The most efficient kitchens keep the total distance between these three points at 15 to 26 feet. Shorter is better for daily cooking; longer forces unnecessary steps.
In open-plan kitchens, the triangle also determines how well you can cook while staying connected to family and guests: too spread out means walking away from the action, too tight feels cramped and inefficient.
Workflow also includes secondary zones: prep areas, cleanup, and appliance placement. Your main prep area should be between the sink and refrigerator. Your range should be positioned so you're not cooking with your back to the room. If you have a dishwasher, place it near the sink but not directly adjacent (it makes the sink area feel crowded).
Consider traffic patterns when designing your work triangle. Avoid placing your range or sink in a high-traffic path where people walking to the living areas disrupt cooking; position your island or secondary counter to absorb traffic without crossing your main work zone.
Zoning and Visual Separation Without Walls
Open-plan kitchens need visual boundaries even without physical walls. Zoning creates distinct cooking, dining, and living areas while maintaining the open feel.
Use flooring changes to define zones: a different material or color in the kitchen signals a boundary without blocking sightlines. Tile, wood, or concrete in the kitchen with area rugs in the dining space creates subtle separation.
Lighting also zones spaces effectively. Pendant lights over your island or main counter define the kitchen area, while recessed or ambient lighting in the dining and living zones creates visual distinction, people understand where the kitchen ends without walls.
Furniture arrangement reinforces zoning. A console table behind a sofa, positioned between the kitchen and living area, creates a subtle boundary. Barstools at an island or peninsula define the kitchen's social edge without blocking the open feel.
Color and material consistency matters too. Carry cabinetry colors or countertop materials into the dining area through accent pieces or built-ins, so the space feels intentional and connected rather than disjointed.
Open-Plan Kitchen Pros and Cons: What to Expect
Open-plan kitchens offer real benefits but come with trade-offs to understand before committing.
Pros:
- Families stay connected while cooking and entertaining
- Space feels larger and more flexible
- Natural light flows throughout the kitchen and adjacent areas
- Entertaining becomes easier with guests able to gather near the kitchen
- Sightlines remain open, making the home feel more spacious
Cons:
- Cooking smells and steam spread throughout your home
- Noise from appliances carries into living and dining areas
- Clutter in the kitchen is visible from everywhere
- Heat from cooking affects the entire open space
- Maintaining clean counters becomes more important since everything is visible
The cons are manageable with planning. Good ventilation (a powerful range hood or downdraft system) controls smells and steam, thoughtful storage hides clutter, and zoning with lighting and furniture creates visual separation. We help customers choose appliances and layouts that minimize these challenges while maximizing the benefits of open-plan living.
Appliance Placement and Kitchen Workflow
Where you position each appliance determines how smoothly your kitchen functions day to day, and in open-plan kitchens it also affects how the space looks and how much noise, heat, and odor reach the living areas.
Placement by layout
- L-shape: put the refrigerator at the end of one leg (so its door opens away from the room), the range on the other leg, and the sink where the two legs meet but not jammed into the corner. The corner is the hardest spot to work from, so keep it for counter rather than a primary appliance.
- U-shape: place the refrigerator and range on the two legs that face the living area so the cook stays oriented toward the room, and use the back wall for tall storage, a wall oven, or a pantry. The back wall is the natural home for anything you don't touch every day.
- Galley: keep the sink and range on opposite runs so you turn rather than walk, and put the refrigerator at the entry end of one run so it doesn't block the walkway when open. In a galley, every appliance door swings into the aisle, so clearance is the whole game.
- Island-centric: the island is best used for the sink or a prep zone, not the range, unless you're prepared to invest in island ventilation. A sink on the island keeps the cook facing the room, which is the main reason islands work so well in open plans.
Clearances to plan around
A common planning pattern is a 42-inch aisle in front of a single-cook work zone, widening to about 48 inches where two people pass or the aisle doubles as a traffic path. Leave enough room for the refrigerator door to open fully without hitting an island or opposing counter, measure the door, not just the box. Dishwashers need clearance to open and load; don't tuck one where an open door blocks the only path through the kitchen.
Ventilation, heat, and noise
Ventilation is the appliance decision that most affects daily comfort in an open plan. A ducted range hood exhausting to the exterior removes heat, steam, and odors far more effectively than a recirculating model, which mainly filters grease and returns air to the room. Size the hood to the cooking surface and your cooking style; searing and frying produce more effluent than simmering. Without ducting, a downdraft or high-capacity recirculating unit is the fallback, but expect a compromise.
Noise matters more in an open plan because there's no wall to buffer it. Look for low sound ratings on dishwashers and range hoods, place the dishwasher away from the seating area, and consider a quieter-compressor refrigerator if it sits a few feet from the sofa.
The work triangle, restated for open plans
Workflow also includes secondary zones: prep, cleanup, and appliance placement. Your main prep area should sit between the sink and refrigerator. Your range should be positioned so you're not cooking with your back to the room. If you have a dishwasher, place it near the sink but not directly adjacent, which makes the sink area feel crowded.
Where the microwave and small appliances go
Secondary appliances like microwaves, dishwashers, and specialty equipment should avoid creating dead zones or blocking traffic. A microwave mounted above a counter or integrated into cabinetry stays accessible without consuming counter space; in an open plan, a microwave drawer or built-in keeps the counter visually clear. Group small appliances, coffee maker, toaster, mixer, in one dedicated zone with an outlet bank so they don't scatter across the main work surface.
Lighting and Flooring for Cohesive Open Spaces
Lighting ties open-plan kitchens together visually and functionally: task lighting over work areas keeps you safe while cooking, ambient lighting in the dining and living zones creates atmosphere, and accent lighting highlights architectural features or cabinetry.
Pendant lights over an island or main counter define the kitchen zone while providing task lighting, recessed ceiling lights give general illumination without clutter, and wall sconces plus floor lamps create layered lighting that makes the space feel intentional.
Dimmers on most circuits let you adjust lighting for cooking, dining, or entertaining, transforming how the space feels at different times of day.
Flooring anchors your layout and creates visual zones. A consistent material throughout (wood, tile, or concrete) creates flow, while a subtle color or material change in the kitchen signals a boundary without breaking continuity. Area rugs in the dining and living zones add warmth and further define areas.
Durable, easy-to-clean kitchen flooring handles spills and foot traffic, while softer materials like area rugs in the living zone add comfort and acoustic separation, practical kitchen flooring plus comfortable living space flooring.
Planning the best kitchen layout for open floor plans means balancing workflow, aesthetics, and how your kitchen connects to the rest of your home. The right layout makes cooking easier, entertaining more enjoyable, and your space feel larger and more intentional.
When you're ready to choose appliances for your new layout, The Appliance Wizard can help you select units that fit your design, your workflow, and your budget. Our team offers expert guidance on appliance placement, sizing, and features that work best for open-plan kitchens. Visit us in Marion or Carbondale, or explore our inventory online at www.theappliancewizard.com to find the perfect appliances for your kitchen remodel. We also offer professional installation and flexible financing to make your kitchen upgrade stress-free.
Frequently Asked Questions
What is the best kitchen layout for an open floor plan?
The best layout depends on your space and how you use it. L-shaped and U-shaped layouts work well in larger open floor plans because they define the kitchen zone while keeping sightlines open. Island kitchens suit homes where entertaining matters most. For smaller spaces, a galley or single-wall layout with a peninsula keeps the kitchen functional without dominating the room. Measure your space and consider your workflow, the distance between your refrigerator, stove, and sink should form a compact work triangle of roughly 26 feet or less.
How much space should you leave around a kitchen island?
Plan for at least 36 to 42 inches of clearance on all sides of your island. This allows two people to pass comfortably and gives you room to open appliance doors and drawers fully. In smaller kitchens, 30 inches is the minimum, but it feels tight. If your island has seating, add 15 inches of legroom under the counter for bar stools. These measurements prevent bottlenecks and keep your kitchen functional during meal prep and entertaining.
What are the main pros and cons of an open-concept kitchen?
Open kitchens excel at hosting and family connection, you can cook while watching kids or entertaining guests. They feel larger and allow natural light to flow throughout. The downsides are real: cooking odors spread into living areas, noise travels more, and clutter is always visible. Grease and steam can reach furniture and walls. You also lose a separate workspace if you need one. Storage must be carefully planned since open shelving and visible cabinetry require constant tidiness.
How do you make an open kitchen feel separate from the living room without walls?
Use flooring changes, lighting, and furniture placement to define zones. A different flooring material (tile in the kitchen, wood in the living area) creates a visual boundary. Pendant lights over the island draw focus to the kitchen. A console table or low bookshelf behind seating can subtly separate zones without blocking sightlines. Cabinetry height and color also help, taller cabinets frame the kitchen, while the living area stays open. These layers create functional separation while keeping the space feeling connected.