 ultimate-guide
DIY Dishwasher Maintenance Checklist for Homeowners
Table of Contents
- Why Regular Dishwasher Maintenance Matters
- How to Clean Dishwasher Filter and Prevent Odors
- Wiping Door Gaskets and Seals
- Checking Spray Arms for Clogs and Buildup
- Running a Cleaning Cycle with Vinegar or Baking Soda
- Dishwasher Maintenance Schedule: Monthly, Quarterly, and Annual Tasks
- Common Dishwasher Problems and Solutions
- When to Call Reliable Dishwasher Repair Near Me
- Frequently Asked Questions
Last Updated: October 2, 2026
Why Regular Dishwasher Maintenance Matters
A dishwasher that runs without maintenance becomes a breeding ground for bacteria, mold, and mineral deposits. What starts as a minor odor or reduced cleaning power can escalate into expensive repairs or complete appliance failure. The good news: a simple dishwasher maintenance checklist prevents most of these problems.
Regular maintenance extends appliance longevity by years. Food debris accumulates in hidden spaces, the drain pump, spray arms, and filter trap. Hard water minerals build up on nozzles and interior surfaces. Over time, these deposits restrict water flow, reduce spray pressure, and force your dishwasher to work harder. That extra strain shortens its lifespan significantly.
A filter cleaned monthly costs nothing. Replacing a clogged drain pump costs several hundred dollars. The math is simple: invest 15 minutes monthly to avoid major problems later.
Beyond longevity, maintenance improves performance. A clean dishwasher sanitizes dishes more effectively. Spray arms spray at full pressure. The filter traps food debris instead of letting it recirculate. Your dishes come out cleaner, drier, and spotless, which is why you bought the appliance in the first place.
How to Clean Dishwasher Filter and Prevent Odors
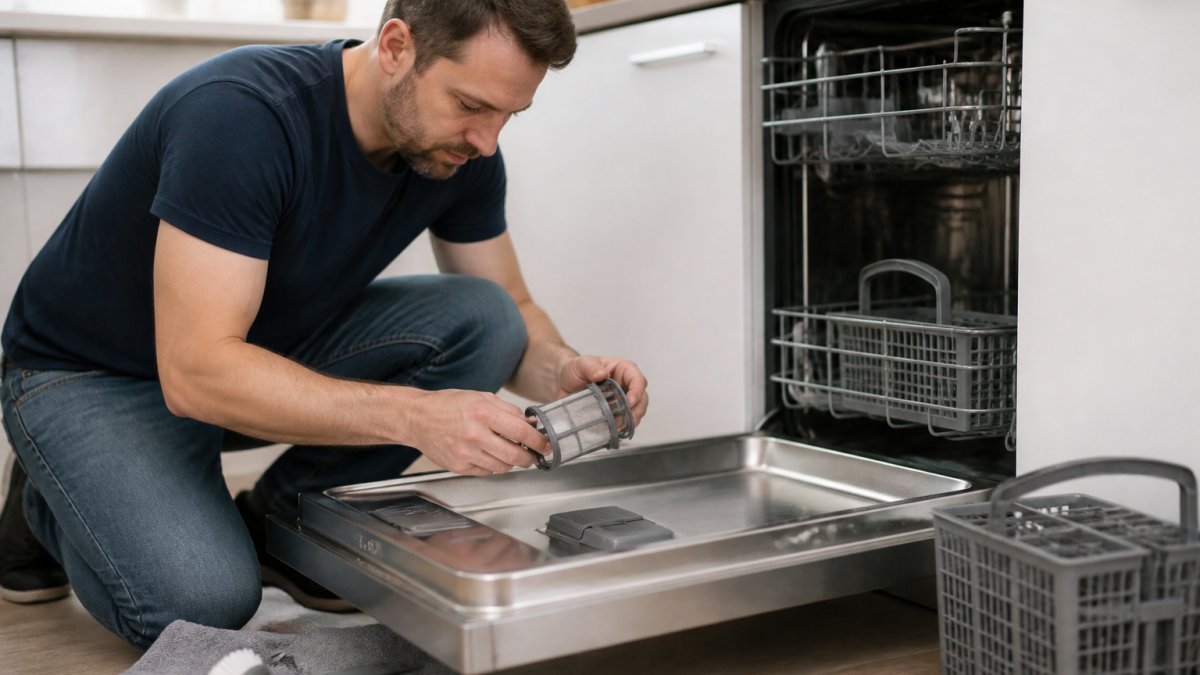
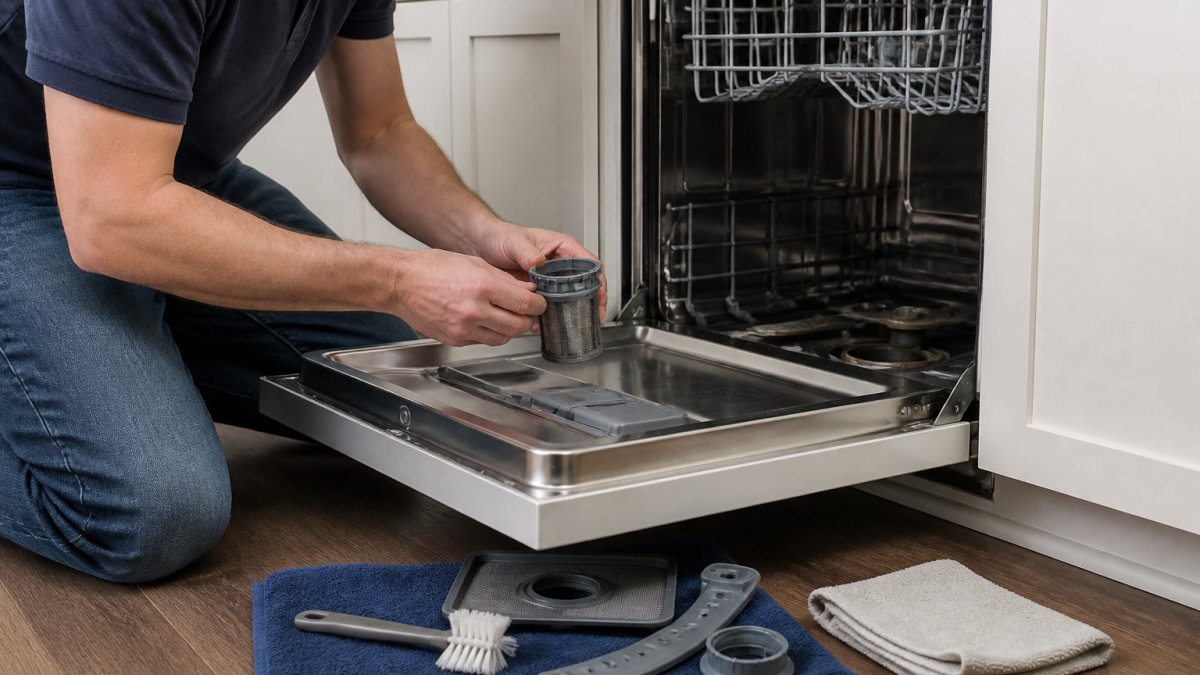
The dishwasher filter is the single most important component in your maintenance routine. This fine mesh screen traps food particles, preventing them from clogging the drain pump. A clogged filter forces water to back up, creating standing water, odors, and eventual drainage failure.
Locating and removing the filter
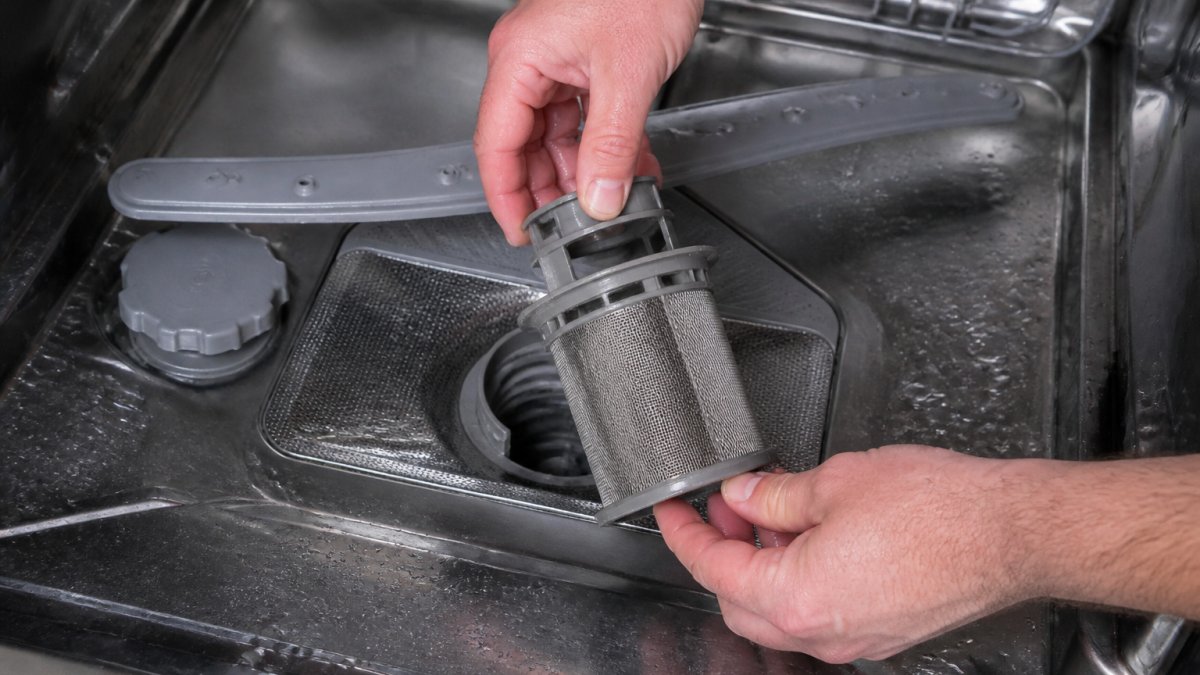
Most dishwashers have a removable filter assembly at the bottom center of the tub. Open the door and look at the floor of the wash chamber. You'll see either a cylindrical filter (twist-out design) or a rectangular mesh screen (lift-out design). Check your appliance manual if you're unsure, different manufacturers use different mechanisms.
For twist-out filters, grasp the handle firmly and turn counterclockwise until it releases. Lift straight up. For lift-out screens, simply pull upward. Some models have a secondary pre-filter cup above the main filter, remove that first.
Never force a stuck filter. If it won't budge, run hot water over the base to loosen mineral deposits. Wait five minutes and try again. Forcing a filter can crack the assembly, requiring replacement.
Rinsing and inspecting for damage
Hold the filter under hot running water and use a soft brush to scrub away trapped food particles. Pay attention to the mesh, debris often hides in the tiny openings. A toothbrush works well for this. Rinse thoroughly until water runs clear.
Inspect the filter for cracks, tears, or warping. A damaged filter allows food debris to pass through, defeating its purpose. If you spot damage, order a replacement from The Appliance Wizard's parts inventory.
Check the filter housing, the area where the filter sits. Remove any visible debris or mineral buildup. Wipe the rubber gasket seal around the housing with a damp cloth. A clean gasket ensures a tight seal when you reinstall the filter.
Reinstall the filter by reversing the removal process. For twist-out models, align the handle and turn clockwise until snug, do not overtighten. For lift-out screens, simply press down until seated. The filter should sit flush with the bottom of the tub.
Wiping Door Gaskets and Seals
The rubber door gasket creates a watertight seal between the door and the tub. Over time, food particles, detergent residue, and mineral deposits accumulate in the gasket's crevices. This buildup prevents a proper seal, causing water to leak during the cycle.
A leaking dishwasher can damage flooring, cabinetry, and subfloors. Prevention is far cheaper than water damage repair. Inspect your door gasket monthly. If you see visible debris or discoloration, clean it immediately.
Dampen a soft cloth with warm water and a small amount of white vinegar. Wipe the entire gasket surface, paying special attention to the crevices where the rubber folds. Use a soft brush or old toothbrush to gently scrub stubborn deposits. Never use abrasive scouring pads, they damage the rubber.
After cleaning, dry the gasket thoroughly with a clean cloth. A wet gasket can trap moisture, promoting mold growth. Run your finger along the seal to confirm it's smooth and flexible. A brittle or cracked gasket needs replacement. Contact The Appliance Wizard's service team if you notice deterioration.
Checking Spray Arms for Clogs and Buildup
Spray arms distribute water across dishes during the wash cycle. Each arm has multiple nozzles that spray water at precise angles. Mineral deposits and food debris clog these nozzles, reducing water pressure and cleaning effectiveness.
Locate the spray arms, there's typically one at the bottom and one at the top of the tub. They're usually removable. Check your manual for the exact removal method, as designs vary. Most arms either twist out or slide out of a central hub.
Hold each arm up to a light source and look through the nozzle holes. You should see light coming through clearly. If holes appear blocked, soak the arm in warm white vinegar for 30 minutes. The vinegar dissolves mineral deposits without damaging plastic.
Use a soft pipe cleaner or straightened paper clip to gently clear any remaining blockages. Be careful not to enlarge the holes. Rinse thoroughly under hot water. Reinstall the arms, ensuring they rotate freely without hitting the tub walls or racks.
Running a Cleaning Cycle with Vinegar or Baking Soda
A deep clean cycle removes detergent buildup, mineral deposits, and odor-causing bacteria. This is different from your regular wash cycle; it targets the dishwasher itself, not your dishes. However, not all cleaning agents work equally well for all problems, and understanding their chemical properties helps you choose the right solution for your specific issue.
Vinegar cycles: best for mineral and hard water buildup
White vinegar (5% acetic acid) dissolves mineral deposits and limescale by breaking down calcium and magnesium compounds. This makes it the superior choice if your area has hard water or if you see white, chalky buildup on spray arms, nozzles, or the interior tub.
To run a vinegar cycle, place a bowl filled with white vinegar (approximately one cup) on the top rack of an empty dishwasher. Run the hottest cycle available. The vinegar circulates throughout the machine, dissolving mineral deposits and killing odor-causing bacteria. This method is eco-friendly, nontoxic, and costs pennies per cycle.
Vinegar is less effective at removing stubborn food residue or grease buildup. If your dishwasher smells like old food rather than mineral deposits, baking soda may be more appropriate. For hard water areas, run vinegar cycles monthly. For soft water areas, quarterly cycles usually suffice.
Baking soda cycles: best for odors and organic residue
Baking soda (sodium bicarbonate) is mildly abrasive and neutralizes odors by absorbing and neutralizing acidic compounds. It works better than vinegar at removing food residue, grease films, and musty smells caused by bacterial growth. Baking soda does not dissolve mineral deposits effectively, so it should not be your first choice for hard water areas.
To run a baking soda cycle, sprinkle one cup of baking soda across the bottom of an empty tub. Run a normal hot cycle. The baking soda circulates and scrubs interior surfaces. Some homeowners combine both methods for maximum effect: run a vinegar cycle first to dissolve minerals, then a baking soda cycle in a separate wash to neutralize remaining odors.
Commercial dishwasher cleaners: when DIY solutions fall short
For severe mineral buildup that vinegar alone cannot resolve, commercial dishwasher cleaning products (such as those containing citric acid or specialized chelating agents) dissolve limescale faster and more thoroughly than vinegar. These products are designed specifically for dishwasher interiors and are safe for all materials.
Commercial cleaners typically cost $5-$15 per bottle and last 2-4 cleaning cycles. Follow product instructions carefully, as some require running the dishwasher empty while others require adding the cleaner to the detergent dispenser. If your area has extremely hard water and vinegar cycles every two weeks are not keeping up with mineral buildup, a commercial cleaner used monthly can be more effective and time-efficient.
Frequency based on water hardness and usage
Run cleaning cycles on this schedule:
- Soft water areas: Quarterly (every three months) with vinegar or baking soda
- Moderate hard water: Monthly with vinegar; add baking soda every other month if odors persist
- Severe hard water: Twice monthly with vinegar, or monthly with commercial cleaner
- Heavy usage (daily or near-daily cycles): Increase frequency by 50% regardless of water hardness
If your dishwasher smells musty, produces spotty dishes, or shows visible mineral deposits despite your current schedule, increase frequency to every two weeks until the problem resolves, then adjust downward to find the minimum effective frequency for your situation.
Dishwasher Maintenance Schedule: Monthly, Quarterly, and Annual Tasks
Consistency matters more than intensity. A simple monthly routine prevents problems far better than occasional deep cleaning. Here's a practical schedule:
Monthly checklist
- Remove and rinse the dishwasher filter under hot running water
- Wipe the door gasket with a damp cloth
- Run a vinegar or baking soda cleaning cycle
- Check spray arms for visible debris
- Inspect the drain area for food particles
This routine takes about 15 minutes total. Do it on the same day each month, tie it to a calendar reminder on your phone.
Quarterly and annual tasks
Every three months, perform a deeper inspection:
- Remove spray arms and soak in vinegar if mineral buildup is visible
- Clean the drain pump area with a soft brush
- Inspect racks and tines for rust or corrosion
- Wipe interior walls with a damp cloth to remove detergent film
- Check for any leaks around the door seal
Annually, consider these additional tasks:
- Have The Appliance Wizard's certified technicians inspect internal components
- Replace the filter if it shows signs of wear
- Test the water inlet valve for proper flow
- Verify that detergent and rinse aid dispensers function correctly
This preventative approach catches small issues before they become expensive repairs.
Common Dishwasher Problems and Solutions
Understanding dishwasher error codes and diagnostic indicators
Modern dishwashers display error codes or blinking lights when sensors detect problems. Learning to interpret these codes helps you determine whether a repair is DIY-fixable or requires professional service. Most manufacturers use a standardized system, though specific codes vary by brand.
Common error code categories include:
Water inlet errors (often displayed as codes starting with "E" or "F" followed by numbers like E1, F1, or similar): These indicate the dishwasher is not filling with water or filling too slowly. Check that the water supply valve under the sink is fully open. Inspect the inlet hose for kinks or blockages. If the hose is clear and the valve is open, the inlet valve itself may be faulty and requires professional replacement.
Drain errors (typically E2, F2, or "drain" indicator lights): The dishwasher detected standing water or slow drainage. First, clean the filter thoroughly and check the drain hose for kinks or blockages. Pour one cup of white vinegar down the drain opening, wait 30 minutes, and run a hot empty cycle. If the error persists, the drain pump or internal drain line is likely clogged and requires professional service.
Temperature errors (often E3, F3, or "heating" indicators): The water is not reaching the target temperature for the cycle. Check that your home's water heater is set to at least 120°F (49°C). If the water heater is adequate, the heating element inside the dishwasher may be failing and requires professional replacement.
Door latch errors (typically E4, F4, or a door icon with a line through it): The door latch is not engaging properly or the door is not fully closed. Open the door fully and close it firmly until you hear a click. If the error clears, the latch was simply not fully engaged. If the error persists, the latch mechanism may be bent or the strike plate misaligned; contact a technician.
Control board or sensor errors (often E5, F5, or multiple flashing lights): These indicate internal electronic failures. These errors almost always require professional diagnosis and repair, as they involve circuit boards or sensors that cannot be safely serviced by homeowners.
Consult your dishwasher's manual or manufacturer's website to identify the specific error code your model displays. Many manufacturers provide online error code databases searchable by model number. If you cannot locate your manual, search "[Your Brand] [Model Number] error codes" online.
Mineral deposits and hard water buildup
Hard water contains dissolved minerals that accumulate on interior surfaces, spray arms, and nozzles. Over time, limescale deposits reduce water flow and cleaning effectiveness. Mineral buildup appears as white, chalky residue on dishes and inside the tub.
The solution depends on water hardness. For moderate buildup, run monthly vinegar cycles as described in the cleaning cycle section. For severe mineral deposits, increase vinegar cycles to every two weeks. Some homeowners add commercial dishwasher cleaner products designed to dissolve limescale; follow product instructions carefully.
Consider installing a water softener if your area has extremely hard water. Soft water prevents mineral deposits from forming in the first place, extending appliance life and improving cleaning results. A whole-house water softener typically costs $500-$2,500 installed, but eliminates mineral buildup across all appliances and plumbing fixtures. Point-of-use softeners for the dishwasher inlet are less expensive ($100-$300) but require more frequent salt refills.
Food debris and drain clogs
Drain clogs develop when food particles bypass the filter and accumulate in the drain pump or hose. Signs include standing water at the bottom of the tub, slow draining, or backup during the cycle.
First, check the filter; it may be clogged. Clean it thoroughly as described in the filter section. If the filter is clean, inspect the drain hose for kinks or blockages. The drain hose typically runs from the bottom of the dishwasher, under the sink, and connects to the sink drain or garbage disposal. Straighten any kinks and ensure the hose is not pinched by other plumbing or cabinet contents.
For stubborn clogs, pour one cup of white vinegar down the drain opening and let it sit for 30 minutes. Then run a hot cycle with no dishes. The vinegar dissolves organic debris. If the clog persists after two attempts, contact a professional. Professional drain cleaning equipment can clear blockages safely without damaging internal components or the drain hose.
Rust on racks and tines
Rust appears as orange or brown spots on the plastic-coated wire racks. It develops when the protective coating chips, exposing metal underneath to moisture. Rust spreads quickly and can stain dishes and the tub interior.
Minor surface rust can sometimes be cleaned with a soft brush and white vinegar. However, deep rust requires rack replacement. Most major dishwasher manufacturers stock replacement racks, and aftermarket racks are available online. Replacing worn racks typically costs $50-$150 per rack and is far cheaper than replacing the entire appliance.
Prevent rust by ensuring racks dry completely after each cycle. Avoid stacking dishes too tightly; air circulation helps racks dry faster. If you notice chips in the coating, consider applying food-safe touch-up paint designed for dishwasher racks to prevent rust from developing. Some homeowners wrap the damaged area with food-grade plastic wrap as a temporary barrier until replacement racks arrive.
When to Call Reliable Dishwasher Repair Near Me
Some problems require professional attention. The Appliance Wizard's factory-trained, certified technicians handle repairs that exceed DIY scope.
Call for service if you notice water leaking from the door or sides during operation. Leaks indicate gasket failure or internal component damage. Ignoring leaks causes water damage to flooring and cabinetry.
Contact a professional if the dishwasher won't drain despite a clean filter. This suggests a faulty drain pump or blocked internal drain line. Professional equipment can diagnose and clear these blockages safely.
If the dishwasher won't start or cycle properly, the control board or motor may be failing. These components require specialized tools and expertise to replace. Attempting DIY repair on electrical components risks personal injury and appliance damage.
Strange noises, grinding, squealing, or banging, indicate mechanical problems. These sounds often signal failing pump motors, loose components, or foreign objects in the pump. Professional diagnosis prevents minor issues from becoming catastrophic failures.
According to the Association of Home Appliance Manufacturers, most dishwashers last 9-12 years with proper maintenance. If your dishwasher is nearing the end of its lifespan and requires expensive repairs, replacement may be more economical. The Appliance Wizard offers a wide selection of new and refurbished dishwashers with professional installation and flexible financing options.
The Appliance Wizard's service team provides transparent pricing with no hidden fees. We stand behind our work with warranty coverage on parts and labor. Schedule service online at www.theappliancewizard.com or call for immediate assistance.
A properly maintained dishwasher runs efficiently for years. The dishwasher maintenance checklist outlined here takes minimal time but delivers maximum value. Monthly filter cleaning, gasket inspection, and cleaning cycles prevent 90% of common problems. When professional service is needed, The Appliance Wizard's certified technicians provide expert troubleshooting and repair. Get started with your maintenance routine today, and contact The Appliance Wizard whenever you need genuine replacement parts, professional service, or a replacement appliance.
Frequently Asked Questions
How often should you perform deep maintenance on a dishwasher?
Run a cleaning cycle with vinegar or baking soda monthly to remove detergent buildup and mineral deposits. Clean the filter, door gasket, and spray arms every two to four weeks. Inspect racks and the drain pump area quarterly. This maintenance schedule keeps your dishwasher running efficiently and extends its appliance longevity. Smart dishwashers may alert you when cleaning is needed.
What's the best thing to run through your dishwasher to clean it?
White vinegar is highly effective for removing limescale, mineral deposits, and detergent residue. Place a bowl of vinegar on the top rack and run a hot cycle. For baking soda, sprinkle it on the bottom and run a short cycle after the vinegar treatment. Both are eco-friendly alternatives to chemical cleaners and safe for most dishwasher models. Check your manual if you have a stainless steel interior, as some manufacturers recommend avoiding vinegar.
What are the signs that your dishwasher needs professional repair?
Watch for water not draining properly, persistent odors despite cleaning, spray arms not rotating, cracks in the door gasket, or rust spreading on racks and tines. If your dishwasher won't start, makes unusual grinding noises, or the water inlet valve isn't filling properly, contact a certified technician. The Appliance Wizard's factory-trained technicians can diagnose issues and handle repairs without voiding your warranty.
Is it safe to use vinegar and baking soda in all dishwasher models?
Vinegar and baking soda are safe for most modern dishwashers, but always check your manufacturer's manual first. Some stainless steel interiors or specialty finishes may require different cleaning solutions. Never mix vinegar and baking soda directly in the dishwasher; run vinegar first, then baking soda in a separate cycle. If you're unsure about your specific model, The Appliance Wizard can provide guidance on the safest cleaning methods for your appliance.